Your event is set, the foundation is in place, and now it's time to take it to the next level. Building out your event is where the magic happens, where you shape your vision into a full-fledged experience. In Alkimii, you have a range of tools and features at your disposal to bring your event to life. Click through the links below to learn more!
How to apply Room Hire Charges
- Select the "+Add" button on the left
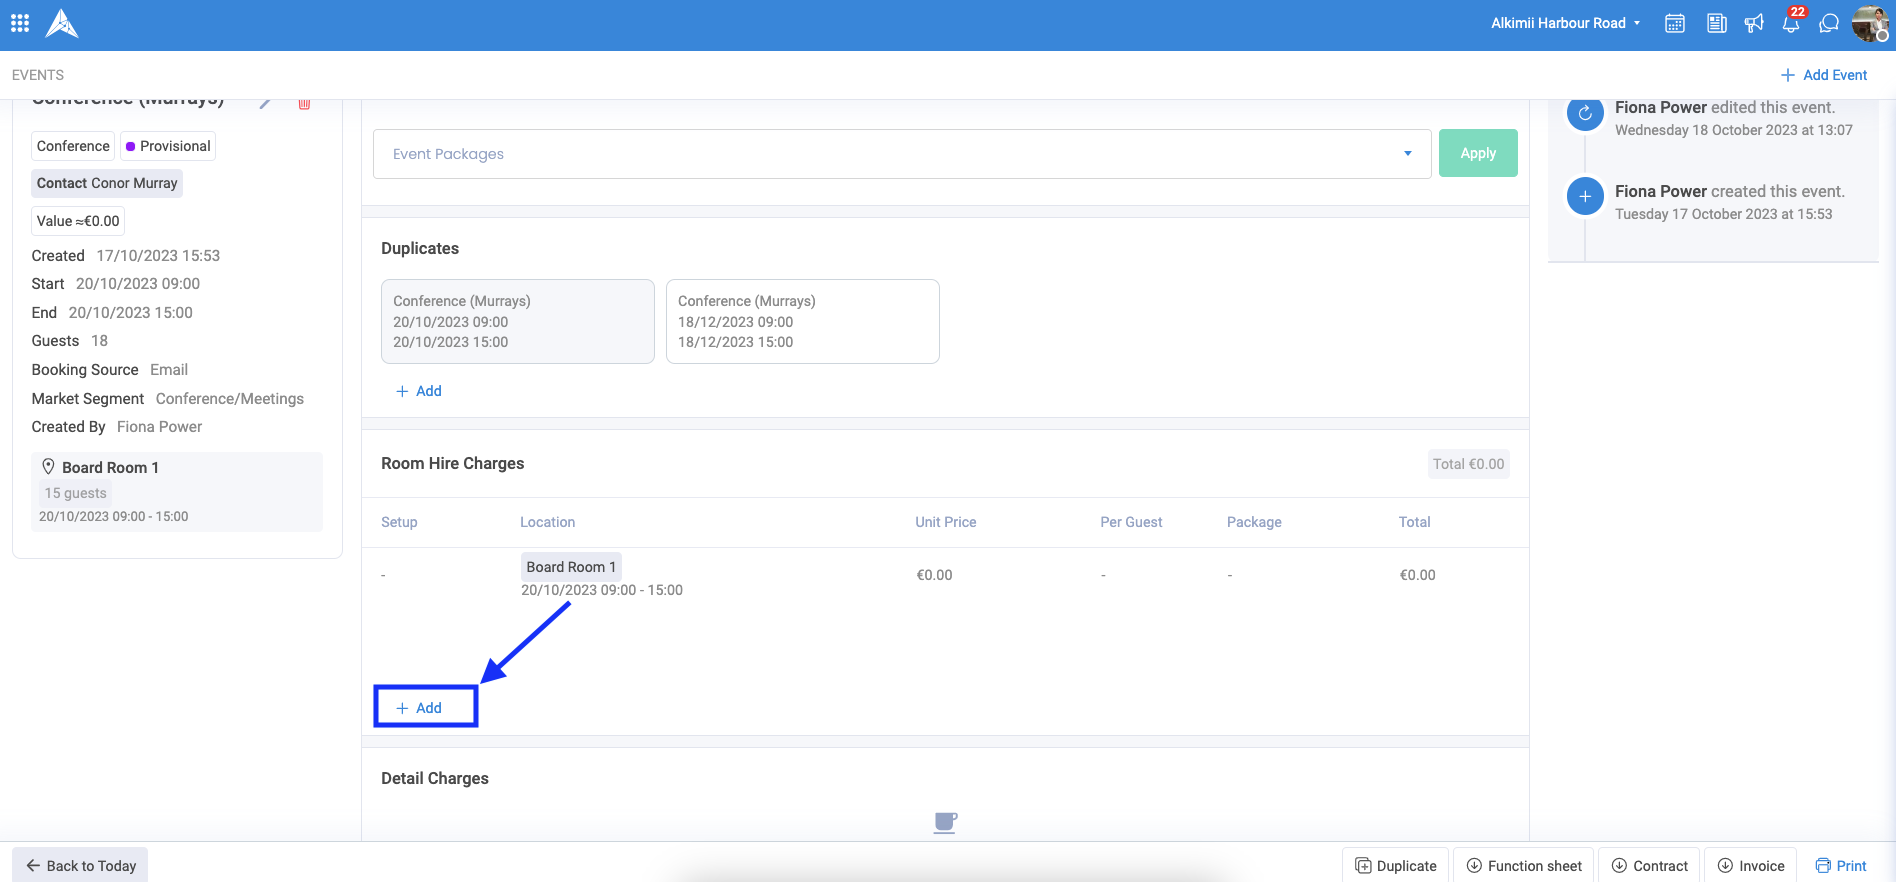
You can then create additional or multiple Room Hire Charges for an Event.
|
 |
|
 |
In this new pop select the location from the dropdown list
|
 |
| Need to create a new location for your event, click HERE! | |
|
Now back to the main room hire details:
|
 |
Event Category
You can now choose the category, which will then be grouped on the Function Sheets.
- This information will auto-populate based on the location information provided.
- If you wish to amend this category you will need to click on the Room Hire Charge and change this accordingly
- To save your preference, click "Update"
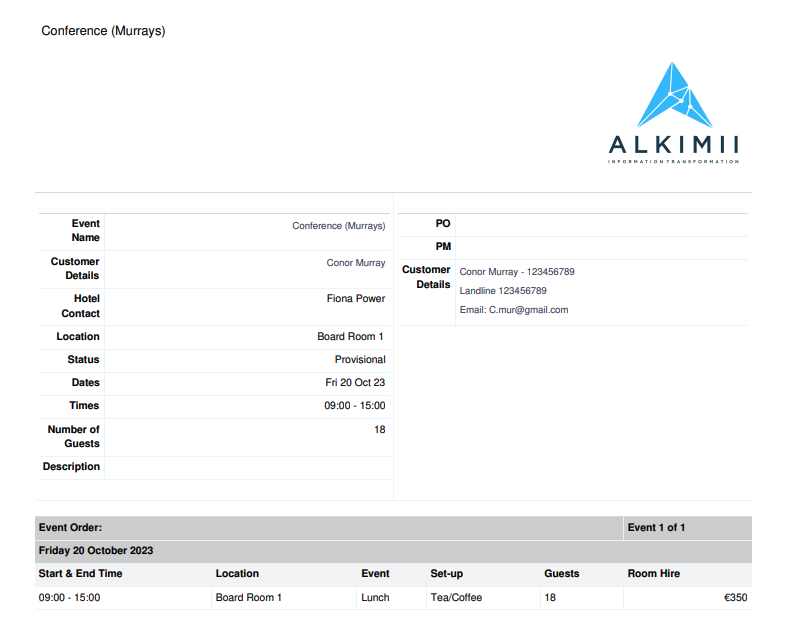
How Room Hire Charges looks on the Function Sheet
To access your Function Sheet, click on the bottom right-hand corner of your screen
If you are updating the Room Hire Charges, ensure that you refresh the document.

- The function sheet will include all Event Categories included in the Room Hire Charges.
How to add Detail Charges to the event?
There is no limit on the number of Detail Charges you can add to an Event.
- Select the "+Add" button on the left
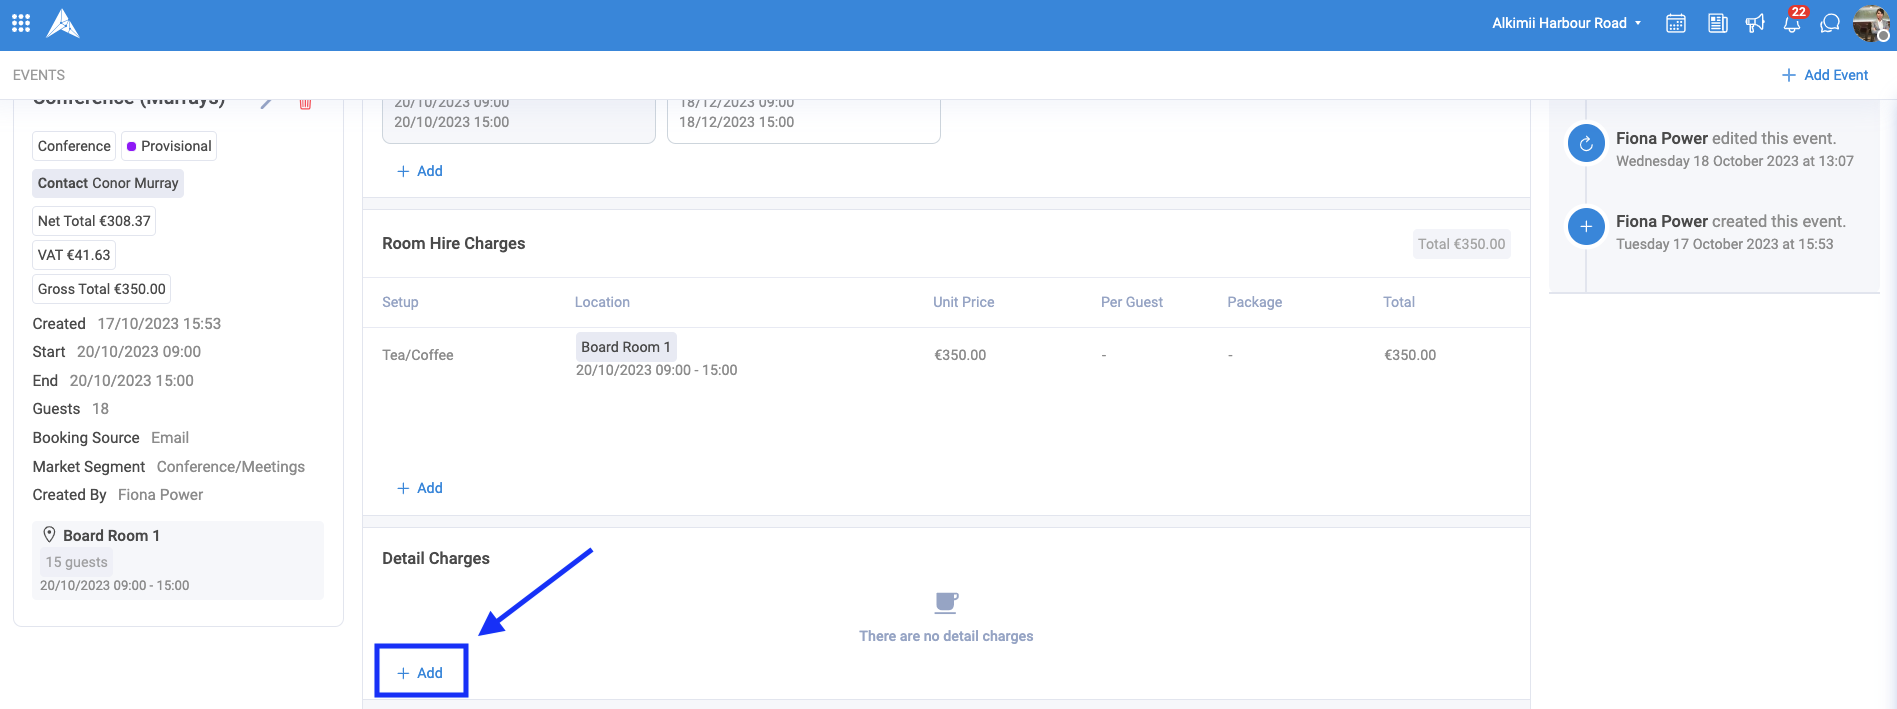
- Select the Add On from the dropdown list.

The add-on you need isn't there? Click HERE for help creating a new Add On
- The Unit Price and Notes will auto-populate once the add on has been selected
- You can edit any of these details before applying the Detail Charge.
- Select the location from the dropdown list.

- To save your detail charge, click the "Create" button
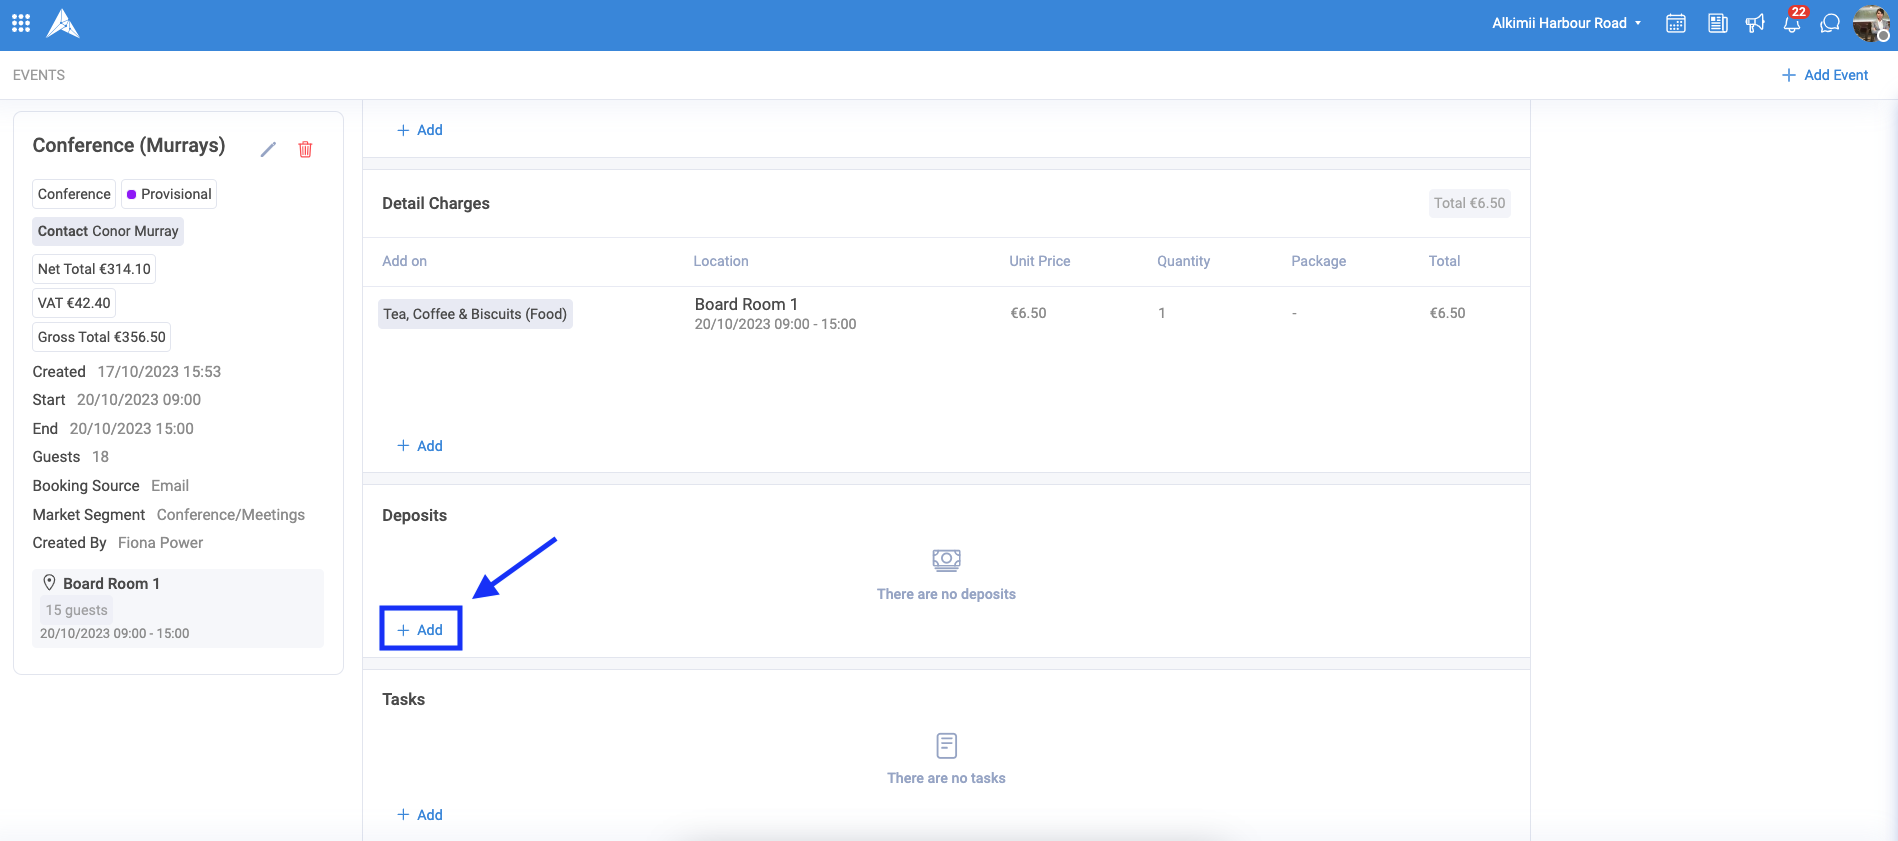
How to add Deposits to your Event?
- Select the "+Add" button on the left
|
 |
|
 |
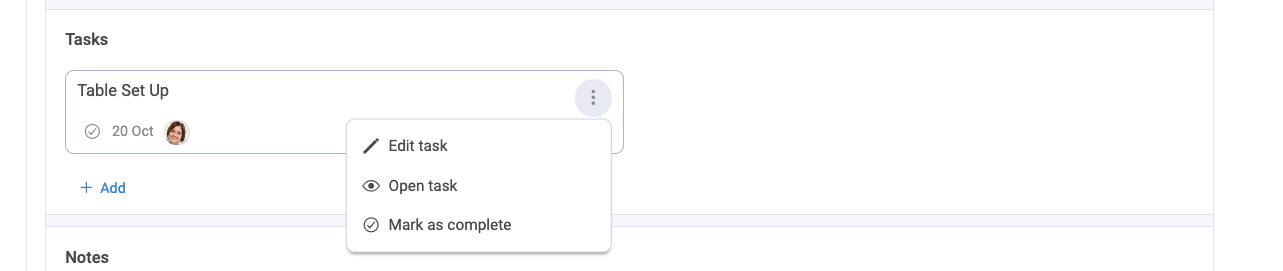
Adding Tasks
If there are tasks associated with the event, they can be created and can be assigned to employees with a due date.
- Select the "+Add" button on the left
- If you have Tasks that need to be carried out before the event, these can be added here.

|
 |
- You can delete, edit and view a task by clicking on the three ellipses beside the task
How to add Notes to the Event?
- Select the "+Add" button on the left

|
 |
The notes type you need isn't there? Click HERE for help creating a new note type
The Note will appear on the Function Sheet and Contract.
|
 |
File Repository
Any files associated with the event can be added here.
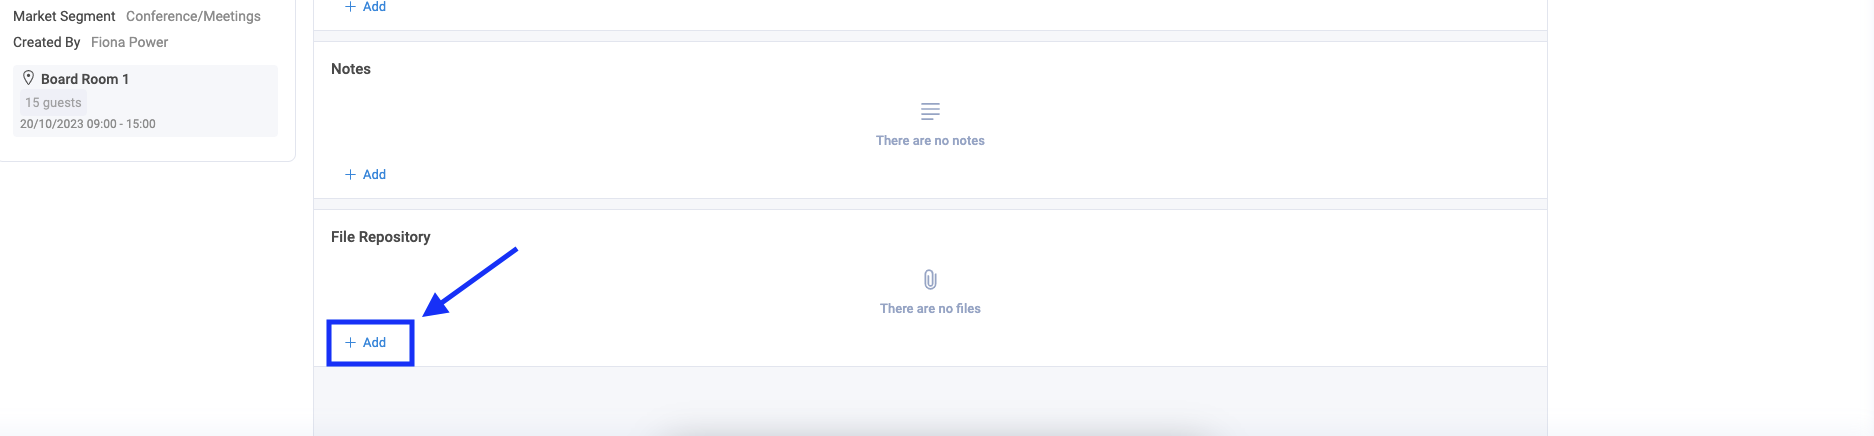
- This will prompt you to select a file from your system to upload
- Once you have selected the file, click "Open"
Other Related Articles
Where can I create an Event on Alkimii?
How to add details to an Event?