When it comes to event planning, the ability to cater to diverse needs and preferences is the hallmark of success. Whether you're organizing a conference, a concert, or a series of workshops, accommodating multiple locations can be a game-changer. In this article, we'll guide you through the process of creating events on Alkimii while incorporating multiple locations. Learn how to seamlessly incorporate multiple locations into your event's itinerary, creating unforgettable experiences for your attendees.
You can create an event in three different ways in Alkimii, in the Availability Calendar, the Events Calendar and the Event Contact.
If you would like to see how to complete this, you can click here!
Adding Multiple Locations
If an Event (For example a Wedding) has multiple locations, you can add all locations to one booking.
When you add the event details:

Step1: Choose the Location
|
 |
Step 2: Capacities and Choosing Locations
When choosing the capacity of the location, you may want to match this to the number of guests in the booking you are creating.
|
|
|

You will not be able to exceed the capacity of the Location within the Booking.
Step 3: Add a Price
|
 |
Step 4: Add Required Setup
|
 |
Step 5: Choose Start and End Dates and Times
|
 |
Step 6: Adding the Event Category
|
 |
Step 7: Adding the Subsequent Locations
|
 |
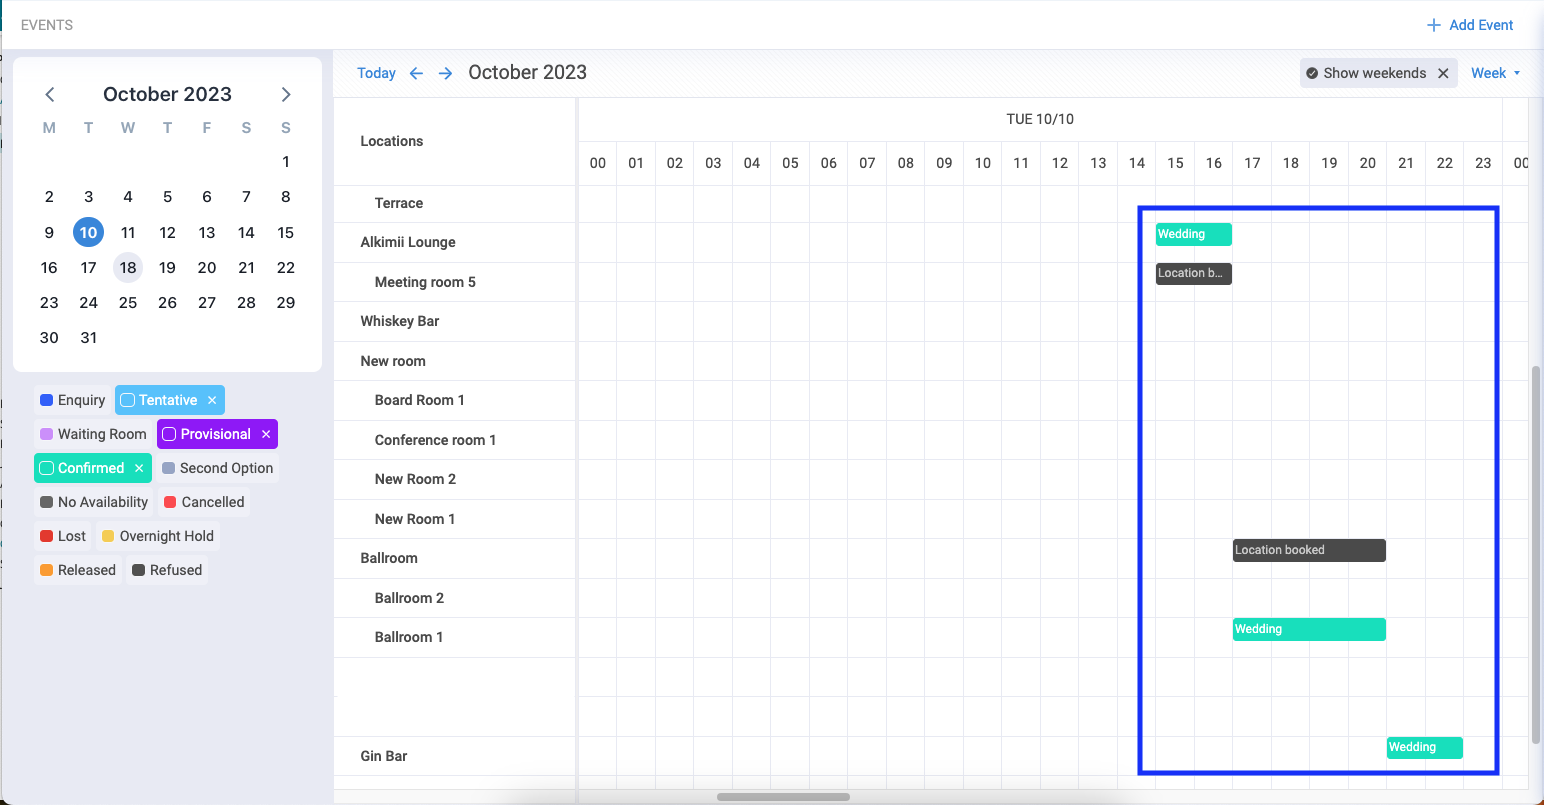
How the Locations will be displayed on the Availability Calendar
- The Locations will be colour-coded according to the status of the Event.
- They will be blocked on the Availability Calendar for the times selected within the booking.
Other Related Articles
What are the different Event Statuses?