Event planning can be a whirlwind of details and deadlines, and having a streamlined way to create and manage tasks is essential for success.
In Alkimii Events, you have a powerful tool at your disposal that allows you to create tasks with ease. Whether you're coordinating a conference, a gala, or any event in between, understanding how and where to create tasks is the key to staying organized and on top of your game.
Explore our Quick Links!
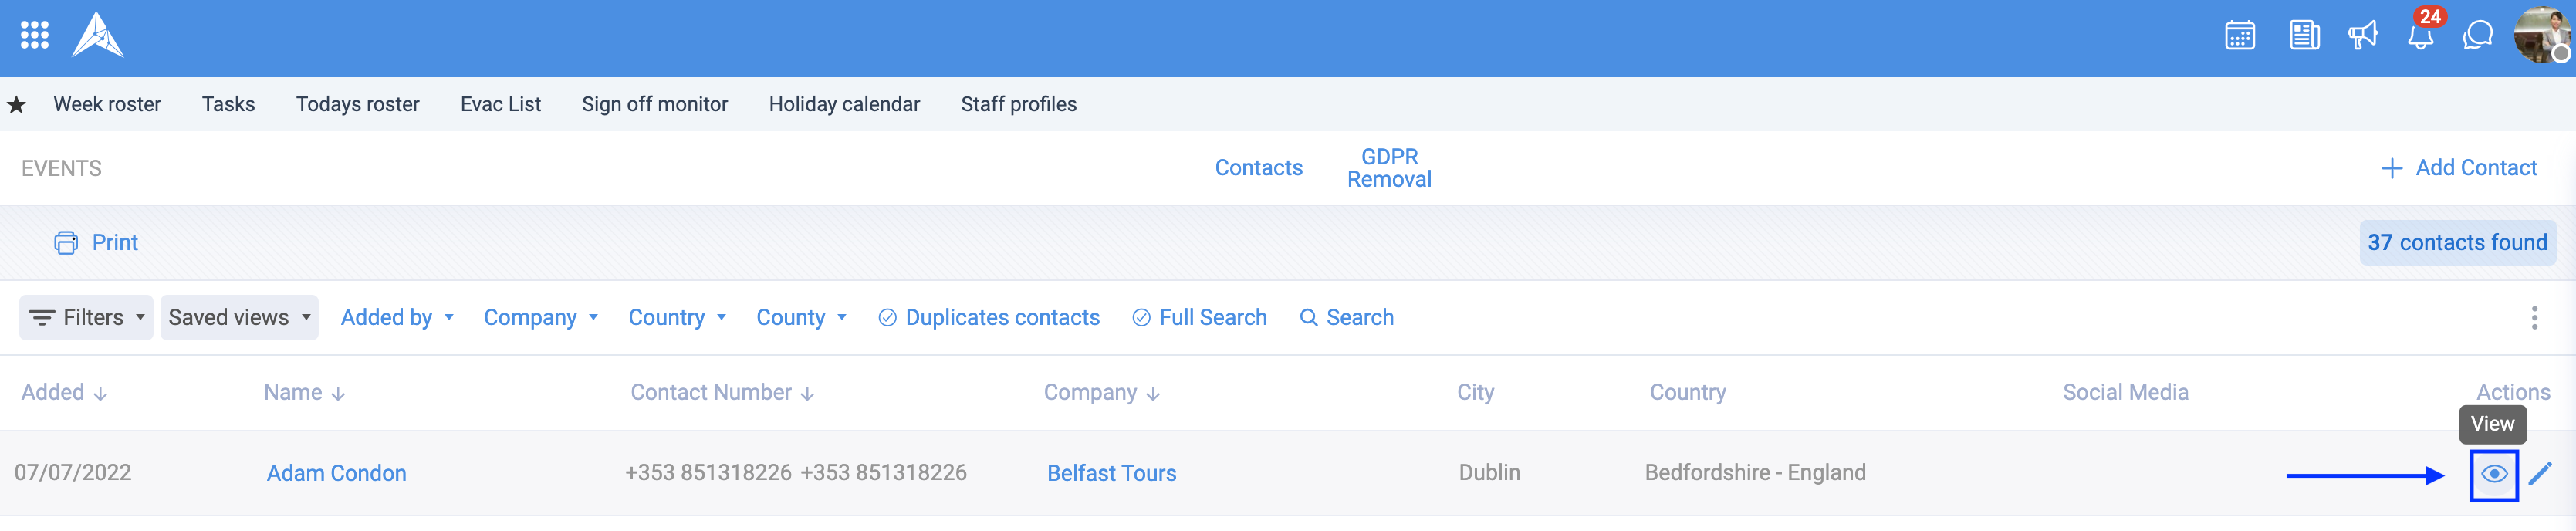
How to create a task within a Company or Contact?
- Within the company or contact view, you will need to click on the eye icon under the actions column to the far right of the screen
|
 |
|
A task pop-up will appear where the user can enter the task information
|
 |
How to create a task using Alkimii Tasks?
- Using the menu, search for "Tasks" using the search bar or click on the tick icon on the left hand side.
- Your default view is the Task dashboard. This dashboard displays all tasks, whether the task was created here or within another area of the Alkimii Application.
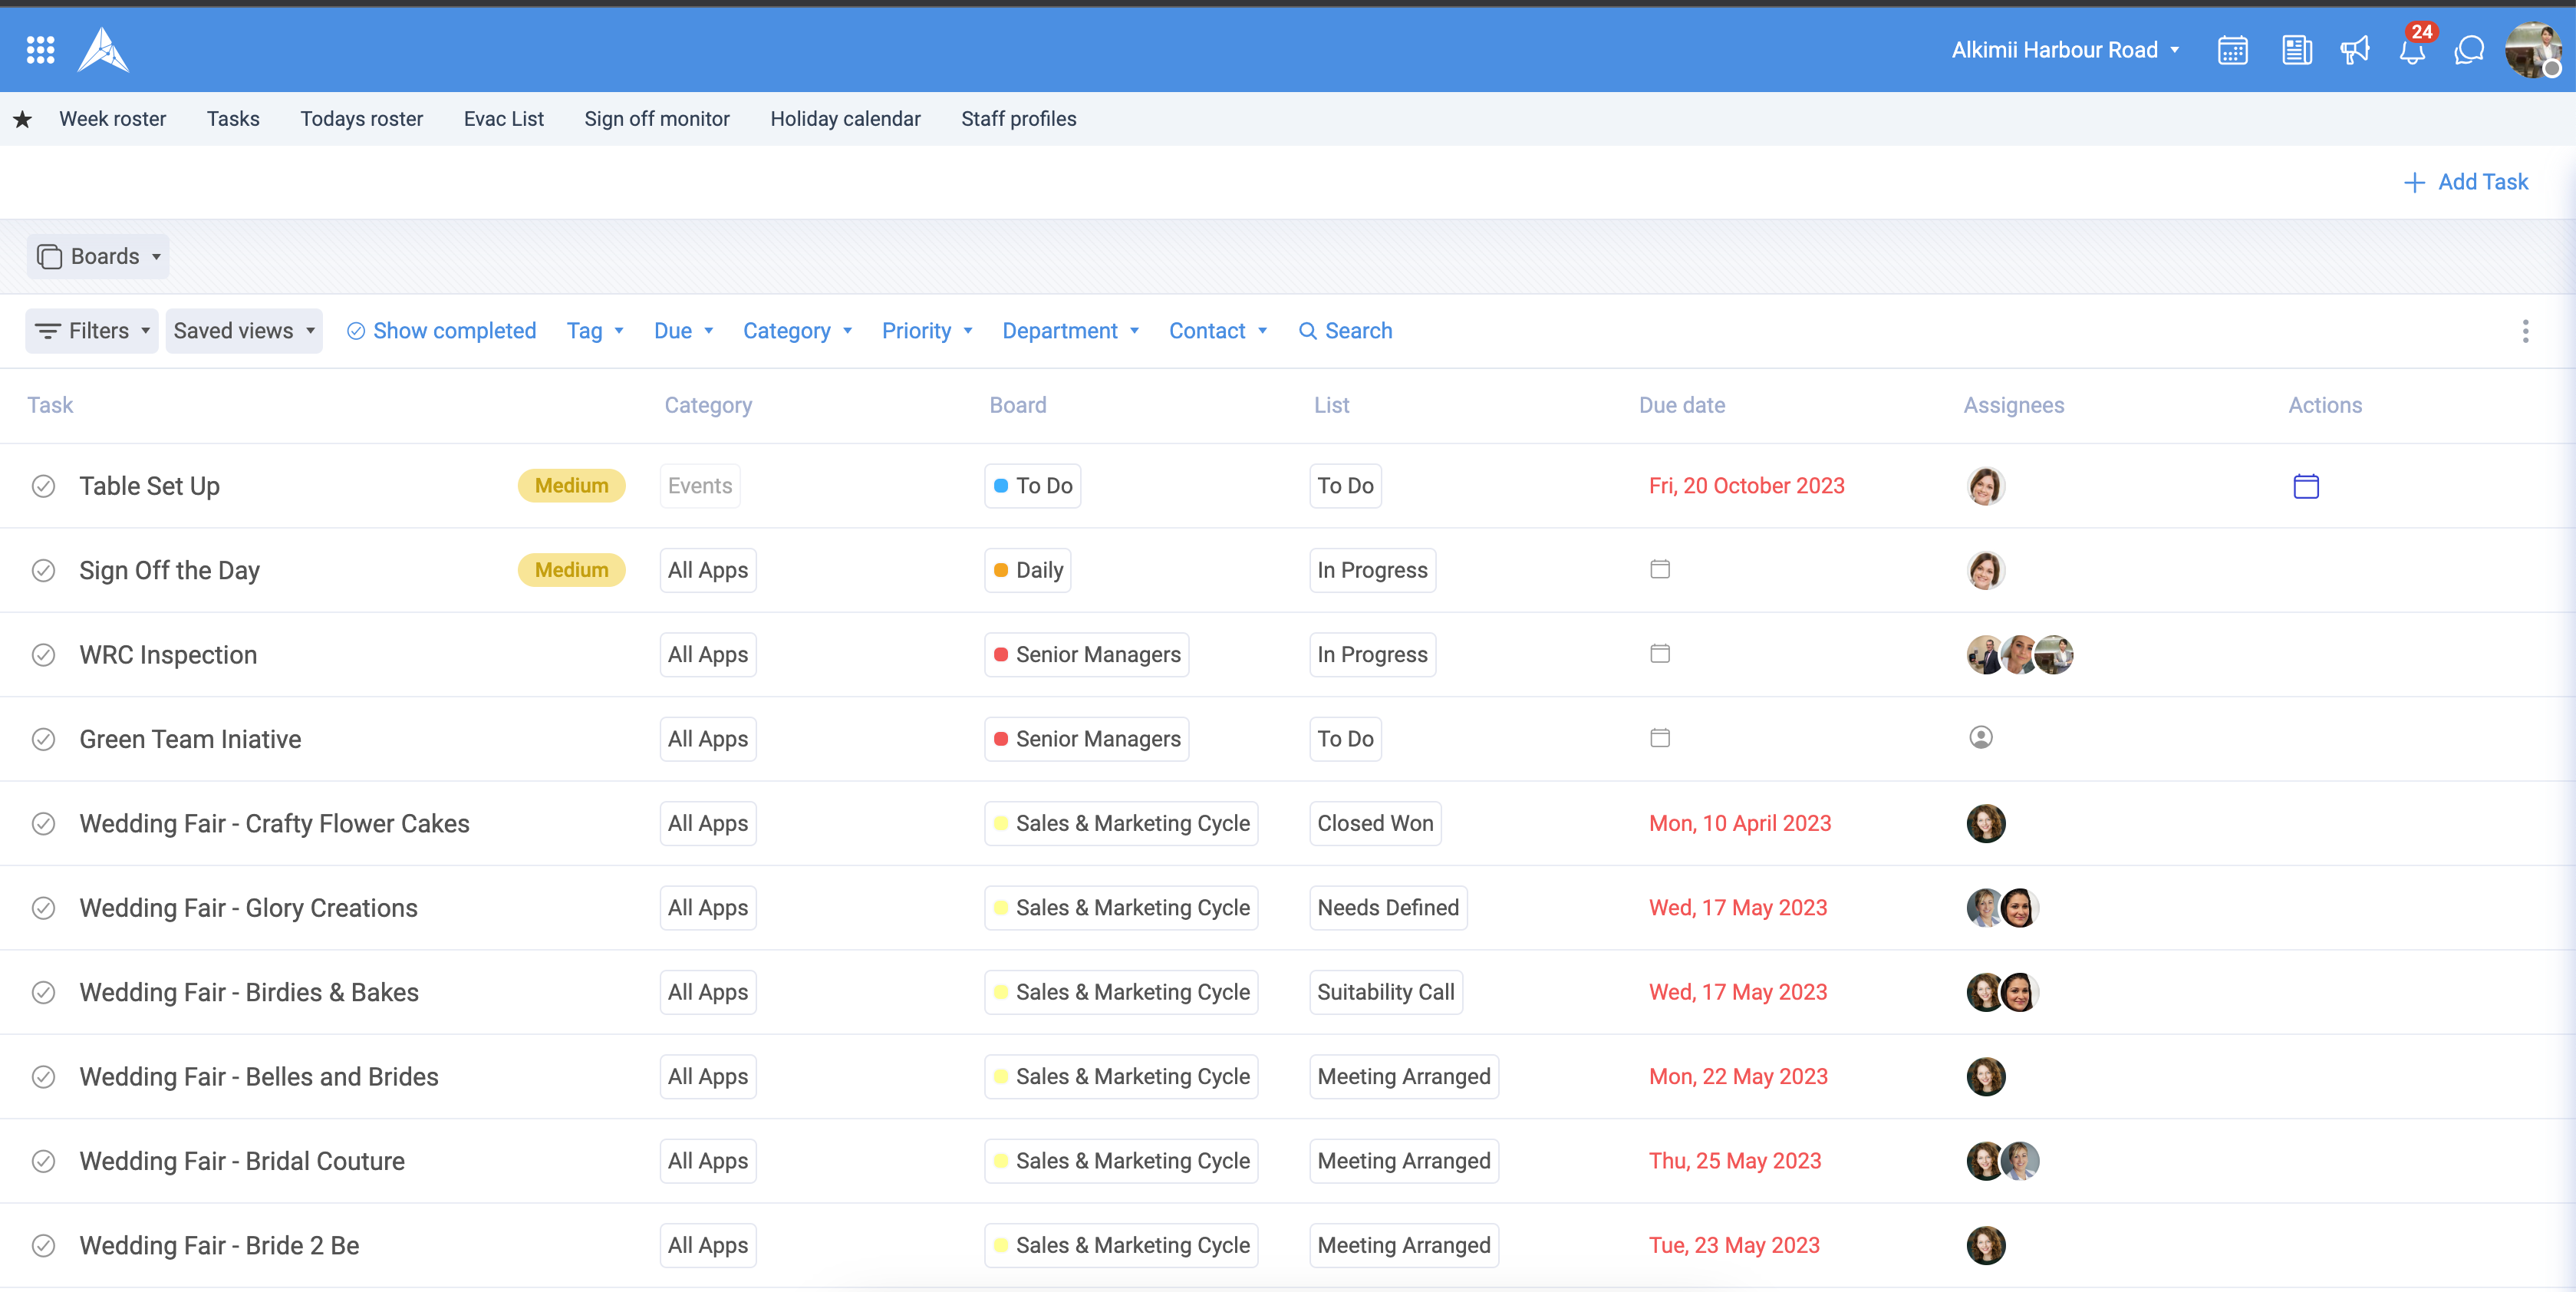
- To see any tasks pre-existing for Events, you will want to filter by "Category" and select "Events" from the dropdown menu.
- This list will include all tasks that have either been created within an event, contact or company in Alkimii
- The actions column will give you a range of options that you can do with the task
- The eye icon will allow you to "View" the task
- The rocket icon (🚀) will allow you to "Start the Task" for your own progress-tracking
- The link icon will allow you to copy the quick access link to this task to share with any colleagues, if applicable
- The bin (🗑️) icon will allow you to delete the task if it was created in error
- If your task was created within an existing Event, a calendar icon (🗓️) will appear in the Actions column. This icon when selected will bring you directly to the Event building page.
How to create a task within the "Tasks" field of an Event?
- In the top right corner of the screen, click "Add Task"
- As the category has been filtered to "Events", this will auto-populate in the task pop-up
If you have no filtered the list, that's ok, you can select "Events" from the task category dropdown in the task pop up.
|
 |
Other Related Articles
Where can I create an Event on Alkimii?
How to add details to an Event?
How to Build an Event once you have created it?