Surveys are a powerful way to collect data and feedback across your site or group. With Alkimii, you can quickly create and distribute surveys to multiple sites, departments, or individual team members in just a few steps. This article will walk you through how to use the Surveys feature so you can capture the insights you need to improve operations, service quality, and team engagement.
- Navigate to "Surveys" in the menu using the search bar
- Your default view will be your Survey Responses
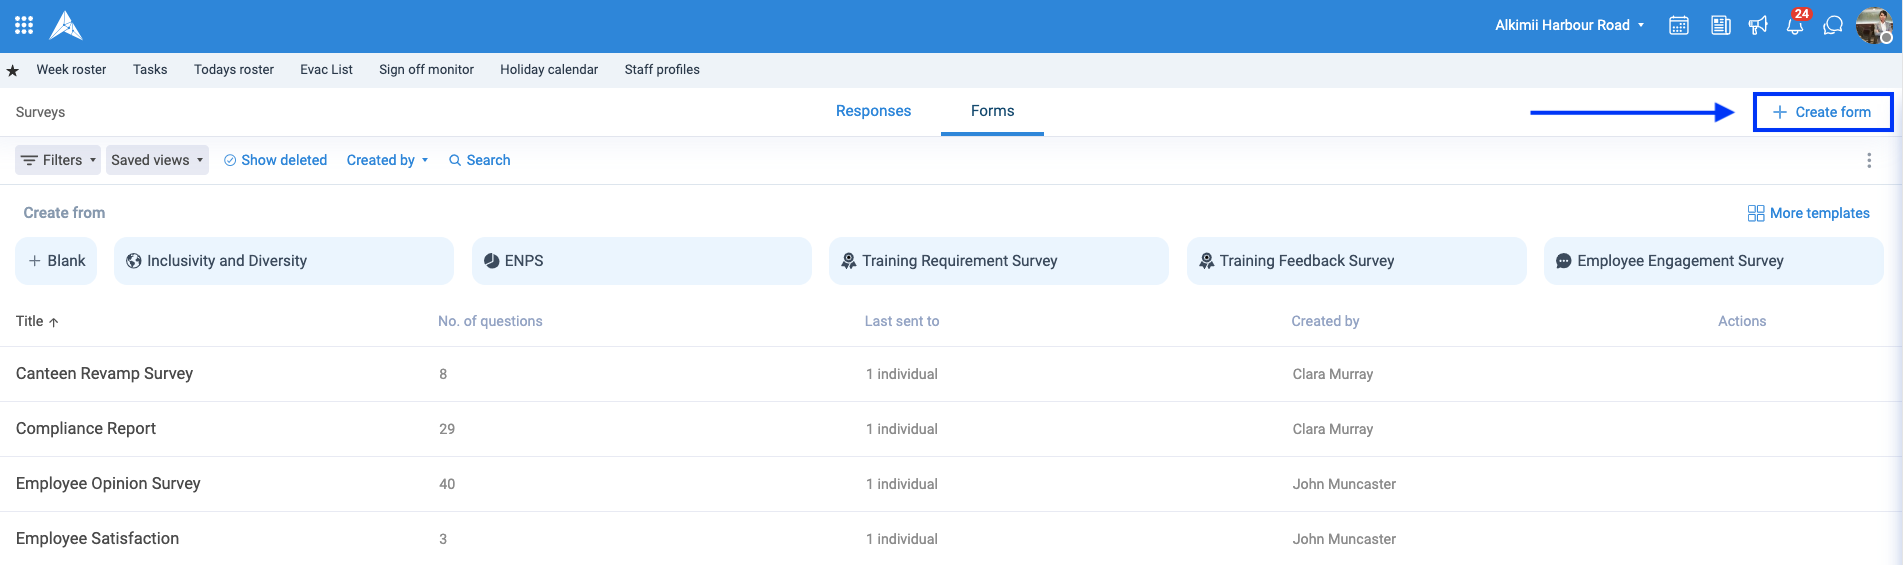
- To create a new survey, select Surveys from the headings along the top.

You have two ways you can create these Surveys, click the quick link below for more inSurveyation
Creating a Survey using Templates
Creating a Survey using Templates
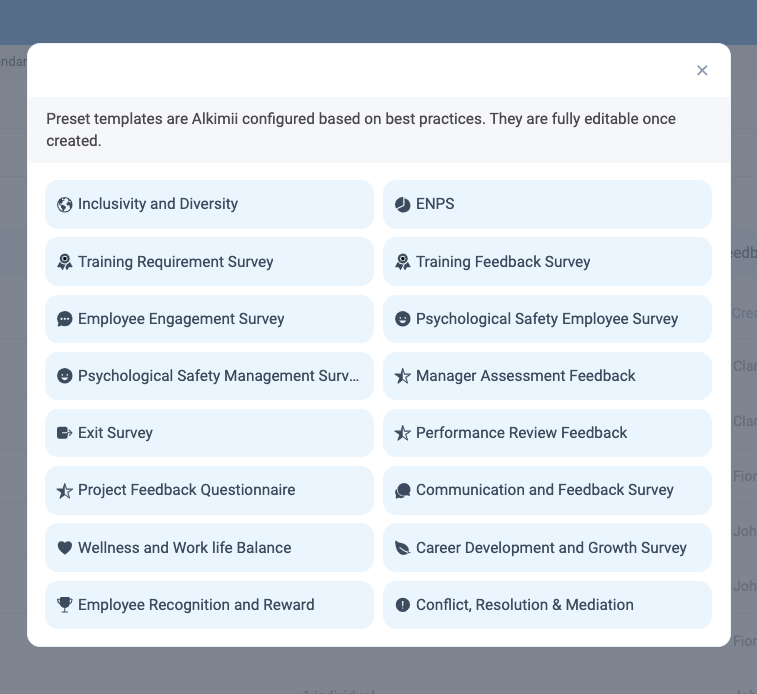
If you wish to create a new Survey in surveys, we offer a range of fully editable templates which can be customised to meet your site's needs.- To see the full range of templates, click "More Templates"

- Select the most suitable template from the list
- You will be redirected to the Survey-building page, where you can add, edit or delete any question as you see fit.
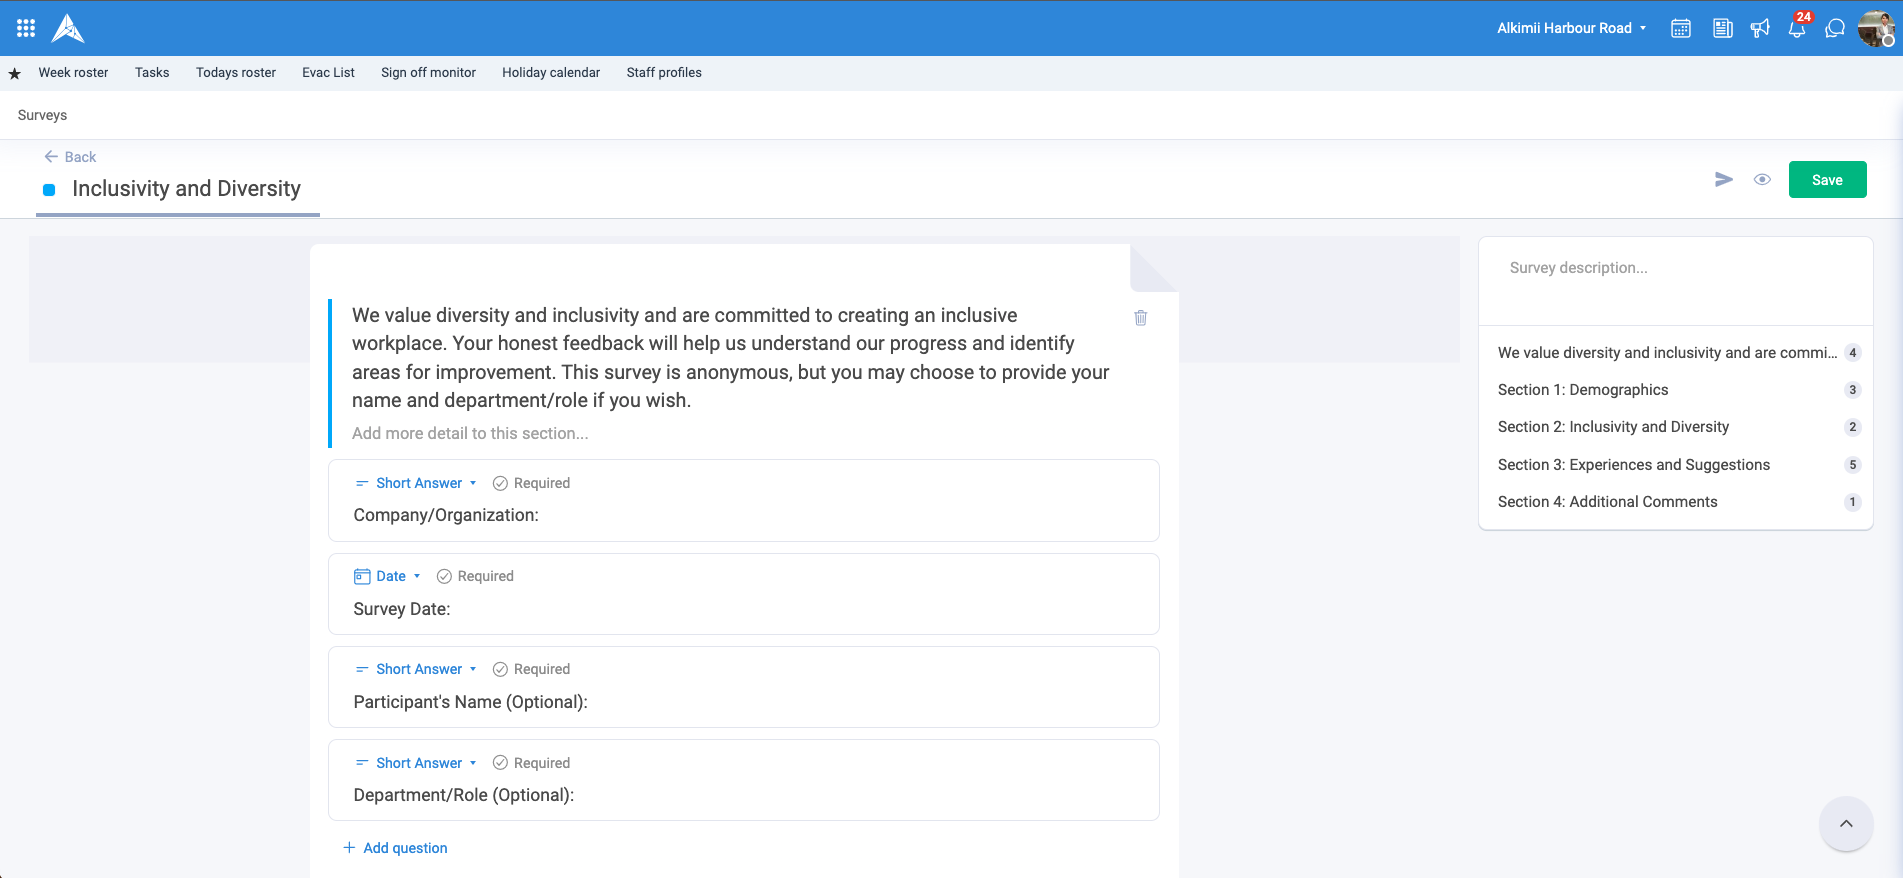
- You can type your own custom Survey description in the free text field to the right
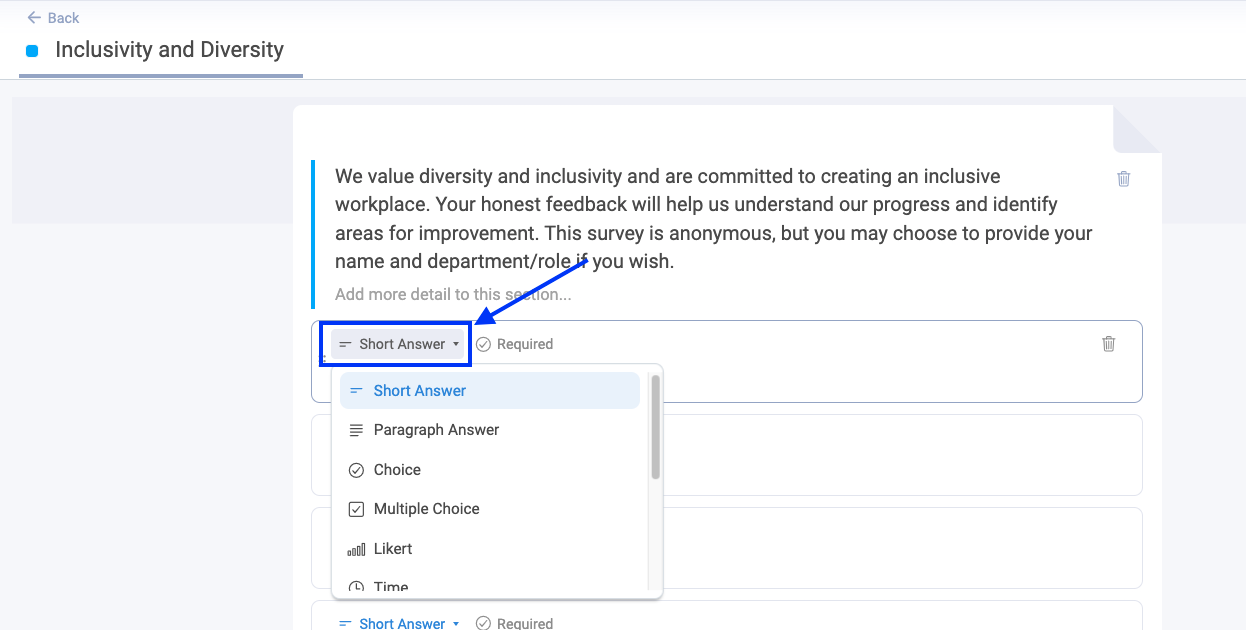
- All text with the template is editable, simply click on the text and adjust as needed
- To change a question style, click on the dropdown menu
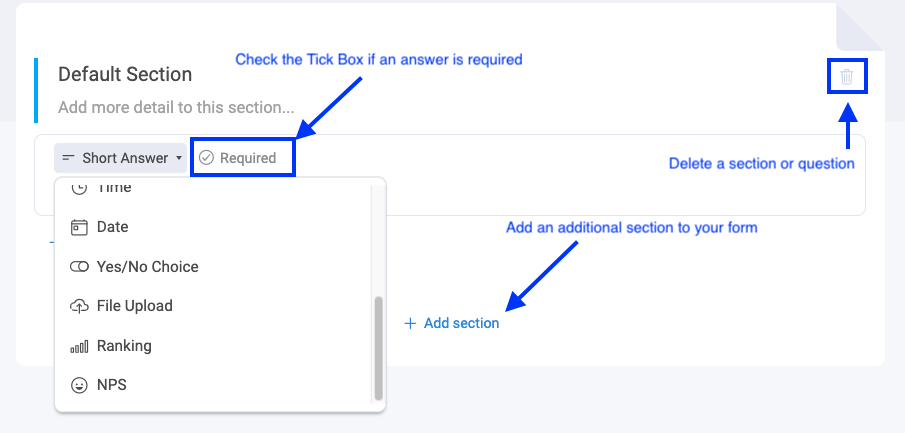
- If a question is mandatory, you can mark it as "Required" by clicking the tickbox
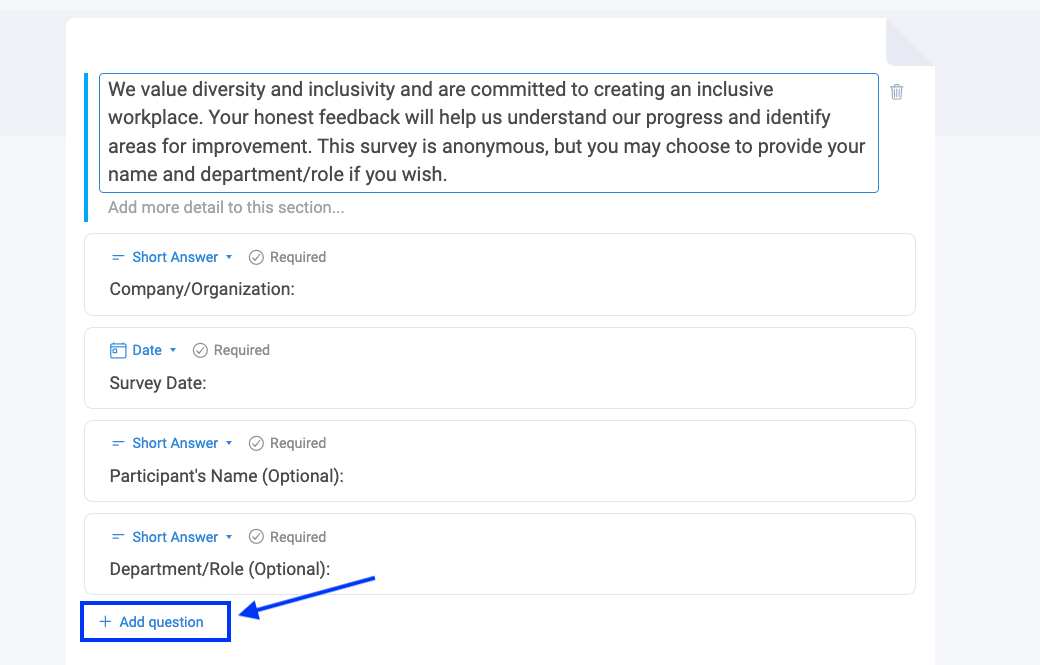
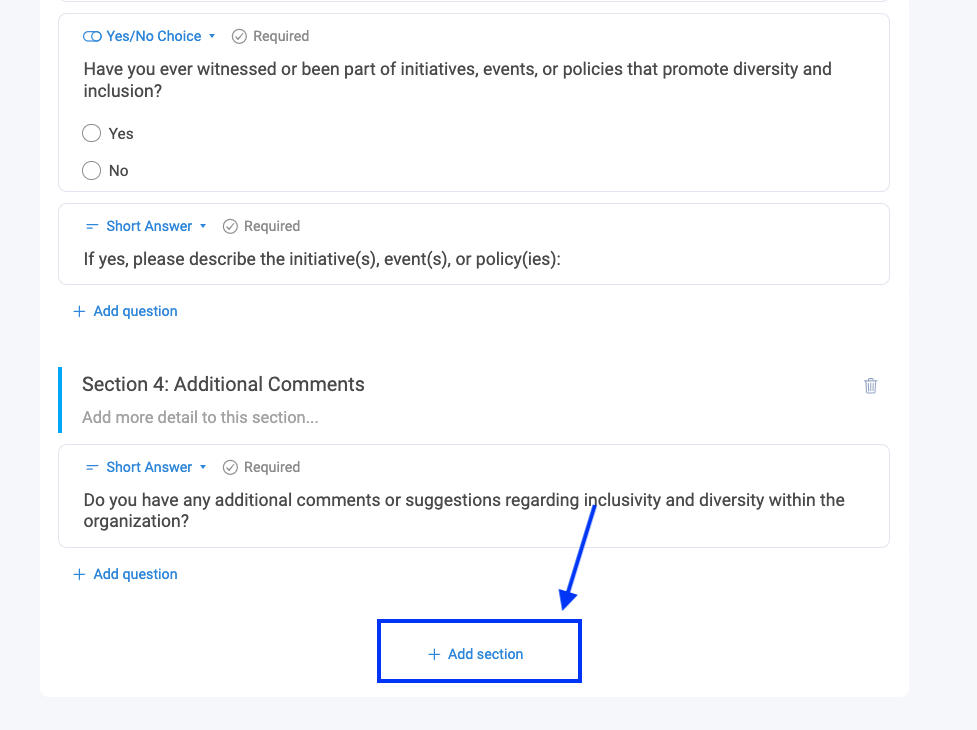
- To add another question to a section, simply scroll down to the bottom of the section and click "Add Question". From here, you can select you question style, type out your question and mark as required if applicable.
- To add a new section to the Survey, scroll to the bottom of the screen and click "Add Section". From here you can add more details about this section in the free text field beneath the section title. Then you can add any relevant questions to this section.
- Every new section added will appear on the right-hand side below your Survey description
- Should you wish to preview the Survey, to see how it will look to the recipient click on the "eye icon" in the top right
- To save any changes, ensure that you click the "Save" button in the top right

Creating a Survey from Scratch
- In the top right corner, select "Create Survey"
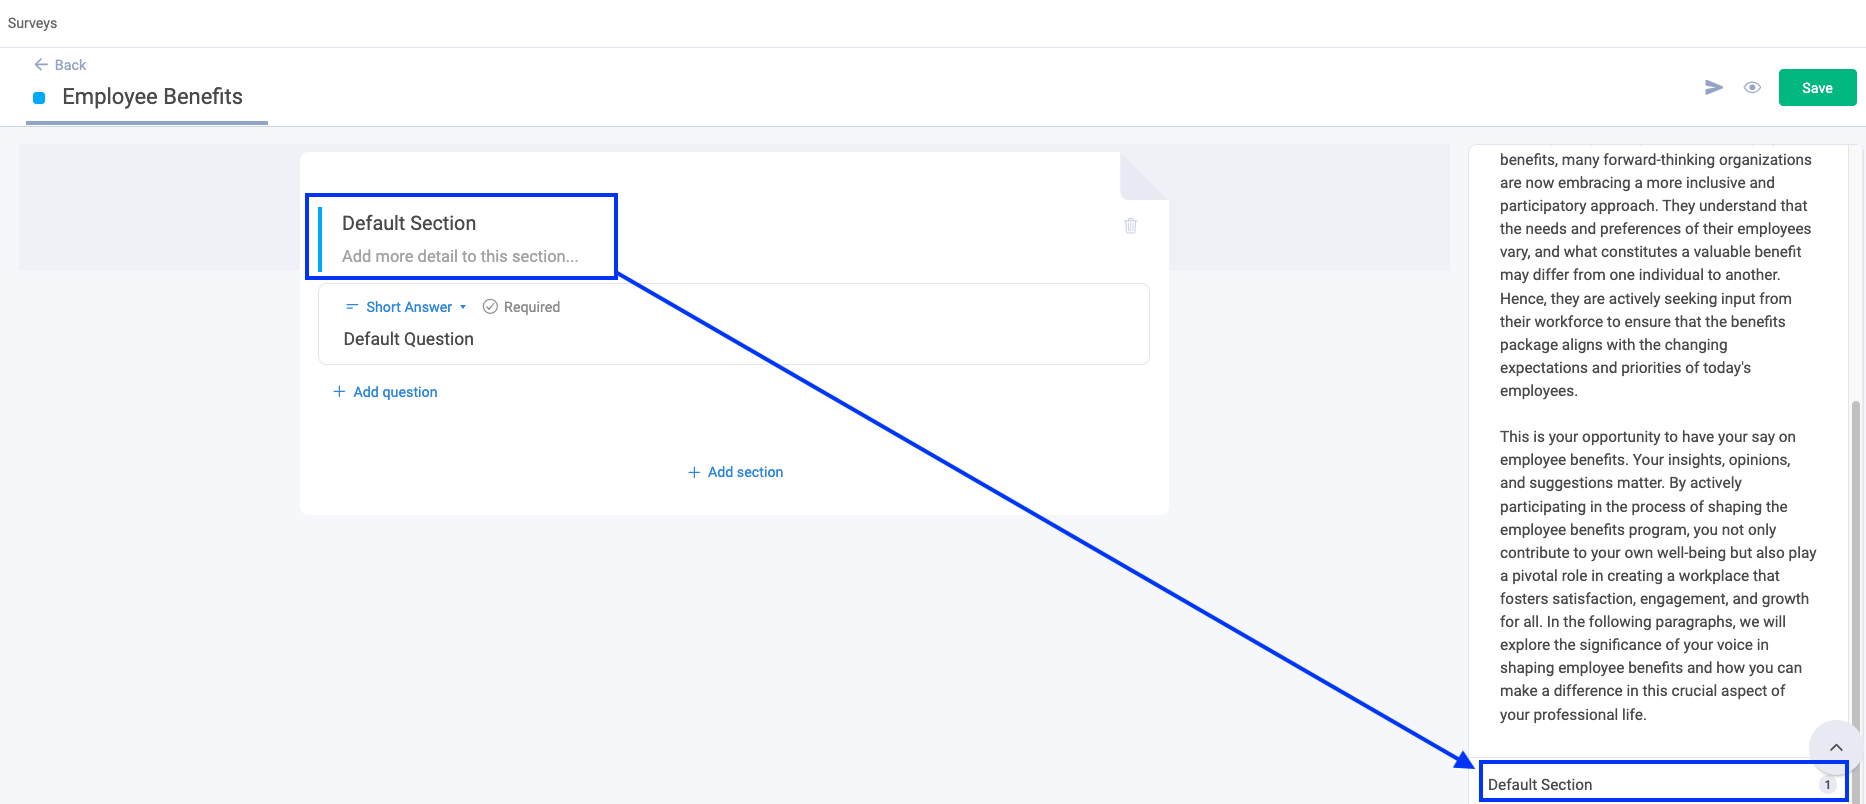
- You will be prompted to enter a title and a description to the Survey. This description will be visible when the employee first opens the survey so we recommend adding a detailed description of why the survey is being conducted and how the feedback will help the cause.

- Now to customise the survey Survey, you will see your description has populated along the right-hand side of the screen
- There will be a default section and default questions visible on all new surveys, these can be amended.

- To the right-hand side, you will see a list of sections and the number of questions in this section.
- Every new section added will appear on the right-hand side below your Survey description
- You have no limit to the number of questions or sections you wish to include in your Survey
- To see a full list of question options available to you click on the dropdown arrow beside "Short Answer" to select your answer type
- Short Answer
- Paragraph Answer
- Choice
- Multiple Choice
- Likert
- Time
- Date
- Yes/No Choice
- File Upload
- Ranking
- NPS
- If the answer is mandatory, please make sure to select the "Required" check box.
- To add another section to your survey, select "Add Section"
- If you need to delete a question or section, click on the "bin icon"
- Should you wish to preview the Survey, to see how it will look to the recipient click on the "eye icon" in the top right

- To save any changes, ensure that you click the "Save" button in the top right

Once your Survey has been Created
- Once saved, click the back arrow to go back to your survey dashboard where you will be able to send the survey.
- You can view the activity log of the survey through the history icon if needed. This is available under the "Actions" column on the far right of your screen


- You will now be able to send your Survey to sites, departments and individuals as you see fit. For more inSurveyation on this, please see the articles listed below.
Other Related Articles