
How to Set Up and Edit Shift Presets?
This article will cover how to create and manage the Shift Presets within your department
- Navigate to Week Roster using the mega menu

- Click on the clock icon beside Shift Preset

- You can add a new preset in two ways:
- Navigate to the top right corner and click Add New Preset
-
- Along the left-hand side, you will see a column "New". With this option you, the department will auto-populate to the department on the left.

- Fill in the requested details
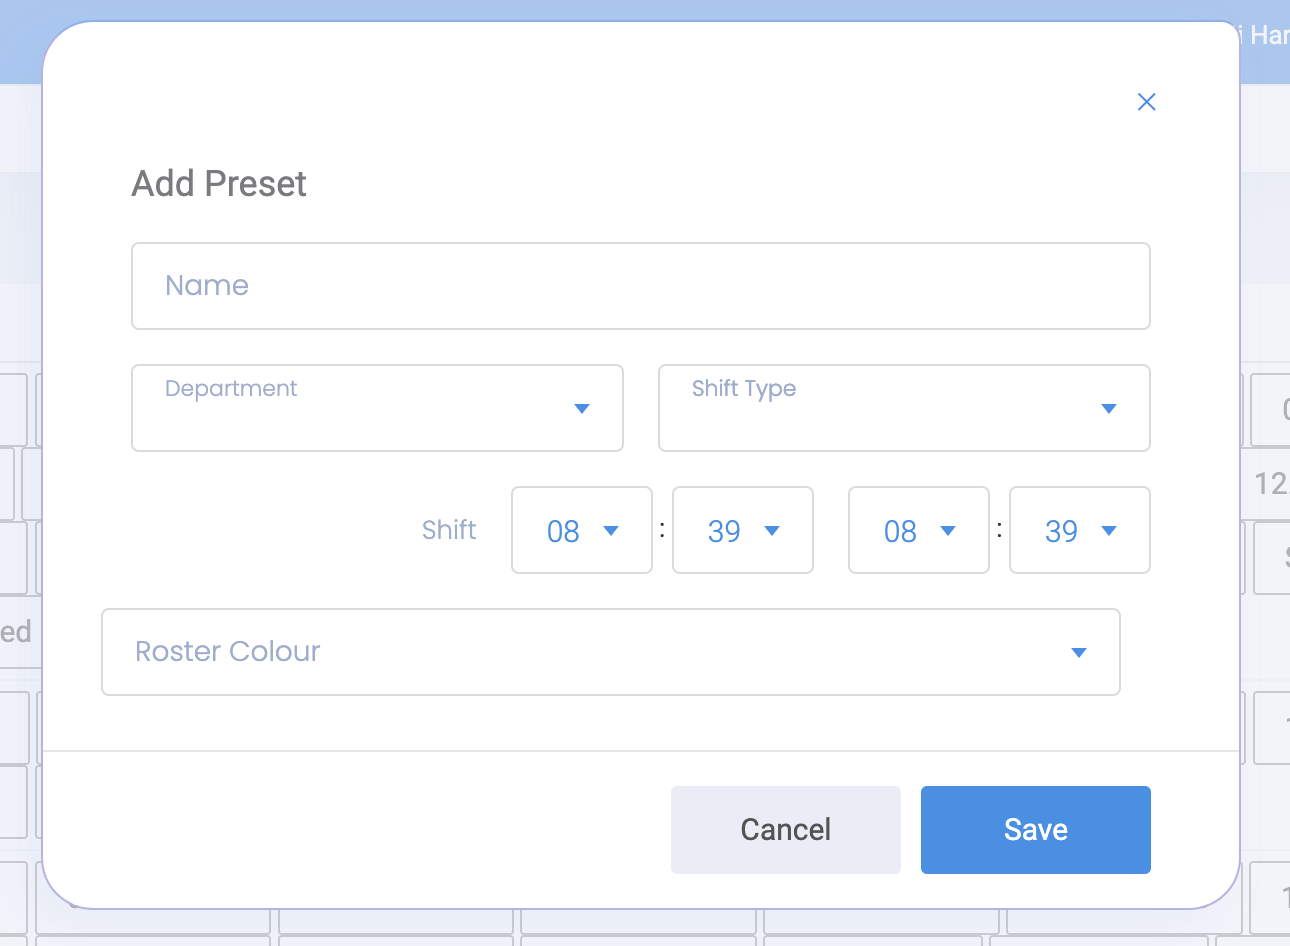
-
- Shift Name
We advise setting the Shift Name to the start and end times for quick and easy rostering.
-
- Department
- Shift Type
- Set the start and end times for the shift
- Enter the time in a 24-hour format
- Optionally set a Shift colour to appear on the roster
- Save
- You can amend/ edit these presets at any stage by clicking on the Preset within the preset page and updating the information accordingly.
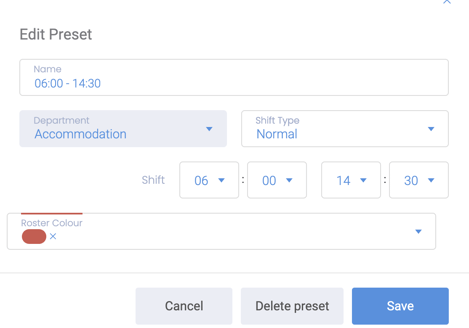
Preset shifts cannot be moved between departments and will have to be set up on an individual basis.
You will now have the ability to use these presets when setting up your Week Roster.
For help creating a shift using Shift Presets, click here!