
Within HR Automation you have the ability to create saved views across your HR Queue, Packs, Forms and Document Store
- To create a saved view, you will first need to select the filters applicable
For example, you wish to create a saved view for "Starter Packs" with the status "Awaiting Response" in your HR Queue so you can monitor and follow up with any new hirers who have not yet sent over the completed pack for your review.
- Firstly, navigate to "Filters" in the top left corner of your screen

- From the dropdown menu, select "Request Status" and "Request type"

- In the "Status" filter, using the dropdown menu select "Awaiting Response"

- In "Request type", using the dropdown menu select "Starter Pack"

- This will now show you all "Starters Packs" which are currently "Awaiting Response" from your employee.
- To save this view, navigate to the top right corner where you will see "Save view"

- Click this option
- A pop-up will appear where you have the ability to name the view as you wish
- You can see which filters have been applied
- You also have the choice to set this particular view as your default. This will override the existing default view which displays all packs with the status "Approval Required"
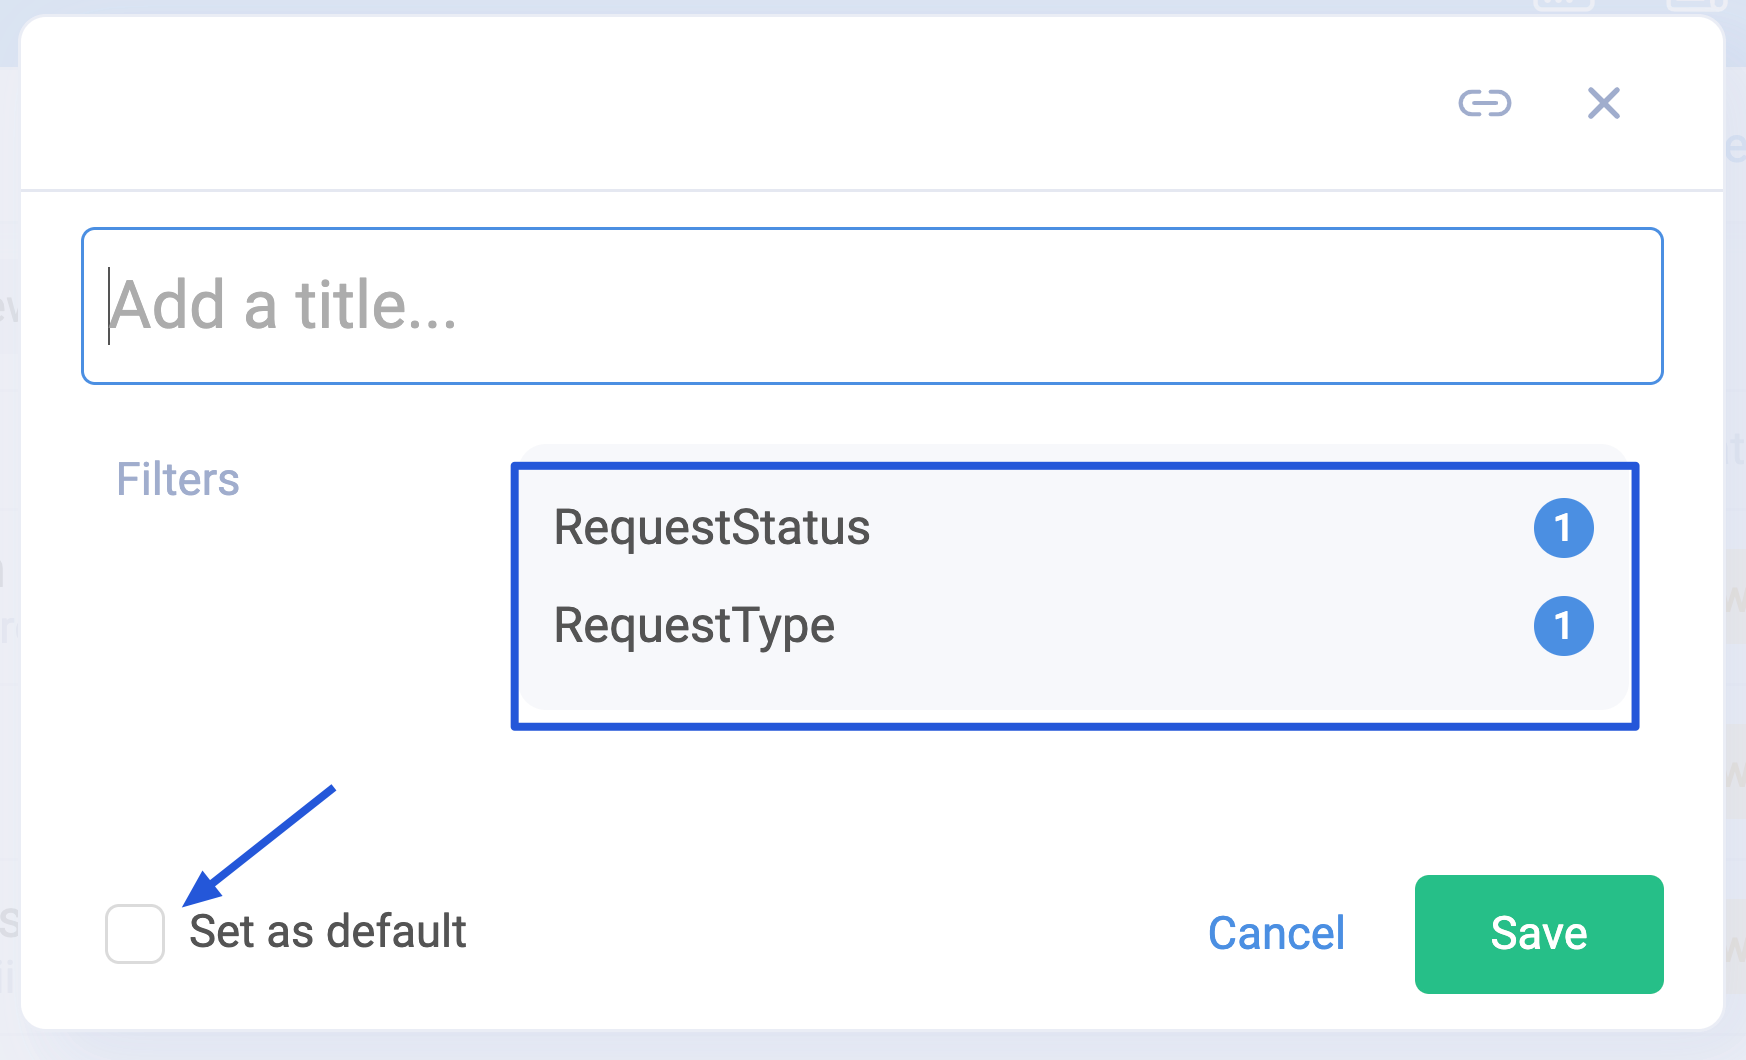
- Click Save if you are happy with this view
- This will now appear under the "Saved Views" drop down for ease of access

- There is no limit on the number of saved views
If you are an organisation who has access to a number of properties, we also have a filter available to check per "Hotel" if you only want to check on the HR Queue for a specific property.