- Using the mega menu, navigate to your "App Settings" at the bottom.

- Within your App Settings, scroll down to CRM
- From the list, click on Meeting Rooms
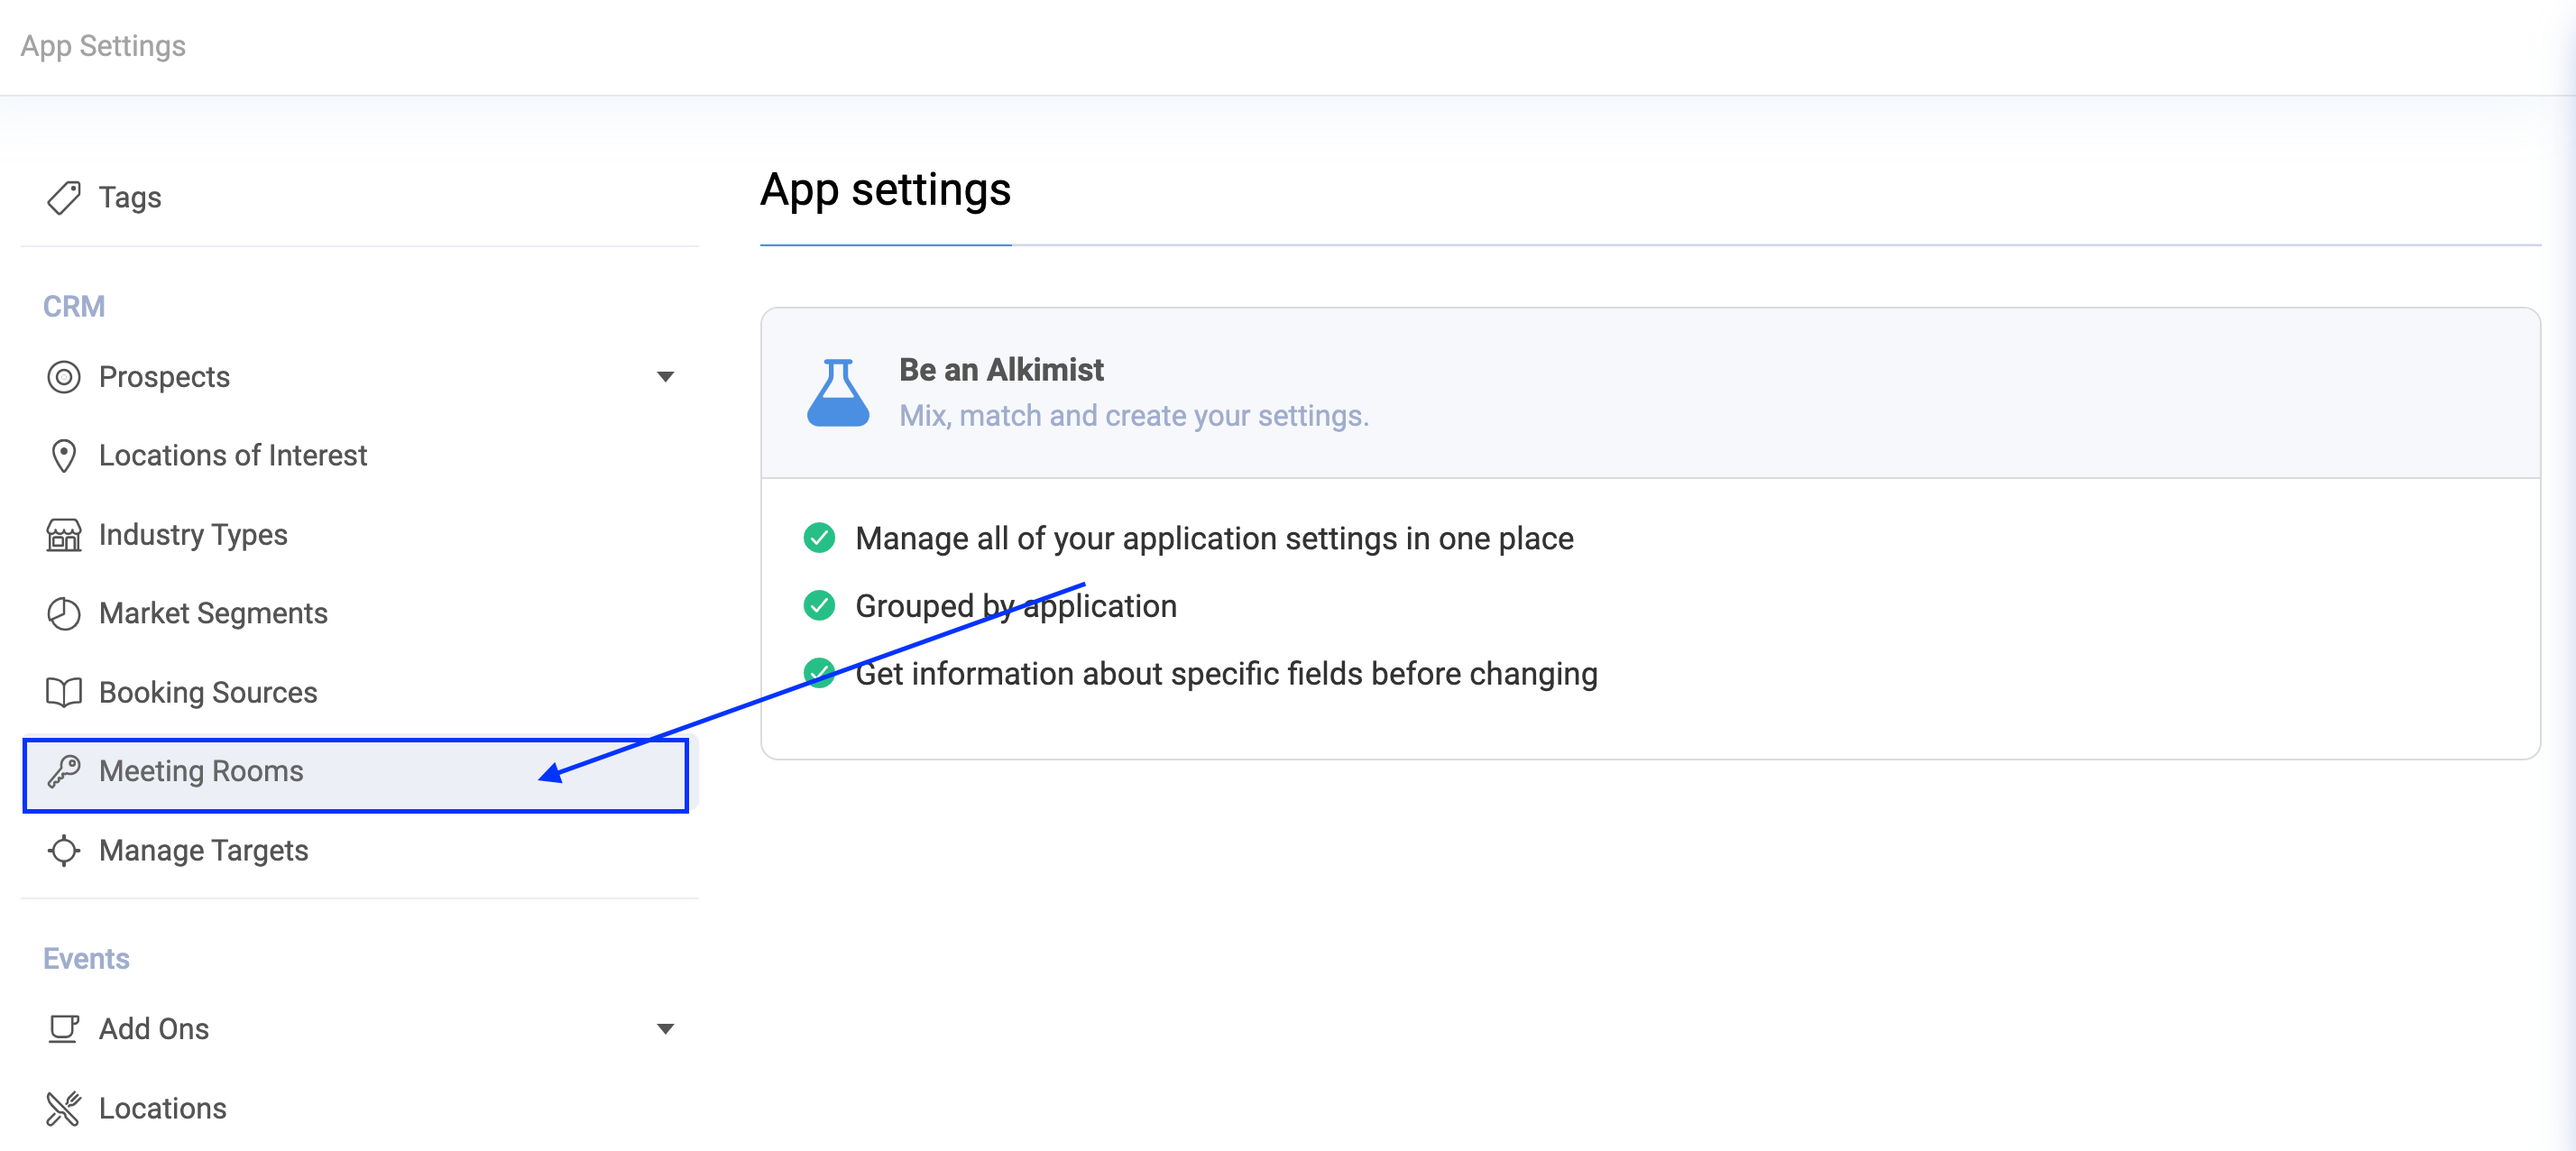
- On the top banner, please ensure that you are within the correct property before proceeding

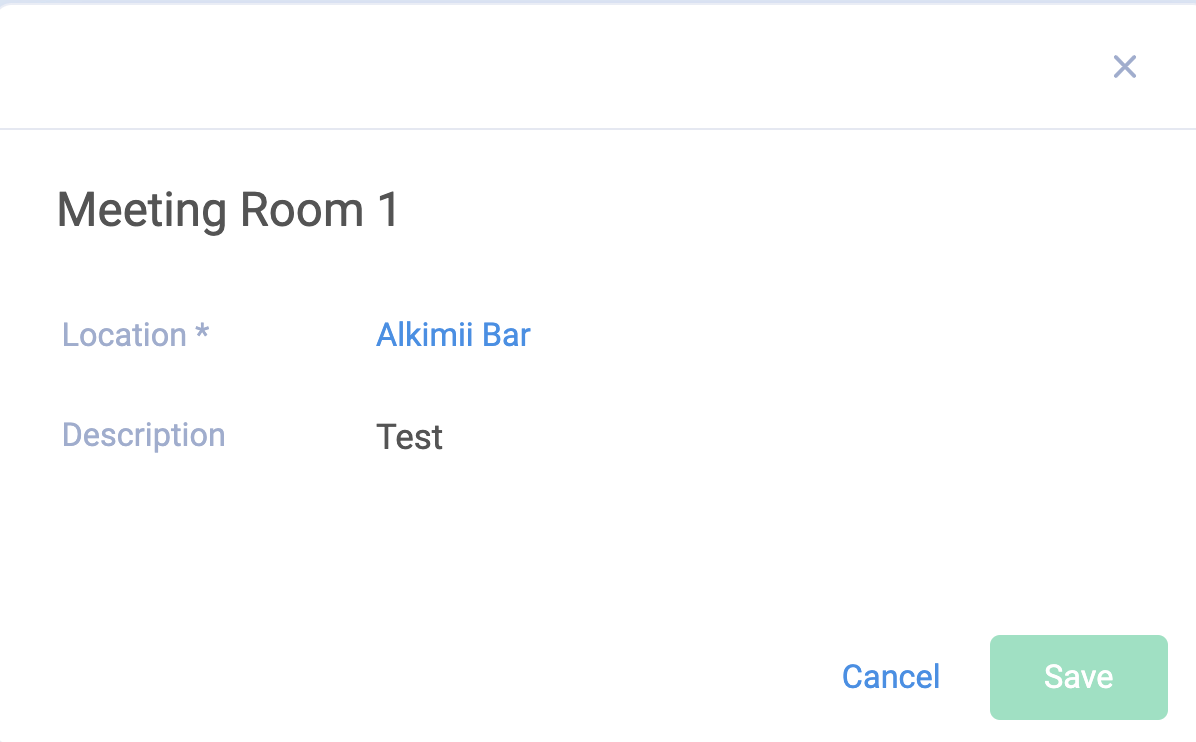
- To add a new meeting room, click on "+ Add Room" in the top right corner

- A pop-up will appear, prompting you to add the Meeting Room title

- You can assign this room to a location within the property
Please be advised that this is a required field, you will not be able to save the meeting room without assigning a location to it.
- Once happy, click "Save"
- This will now appear in your list of meeting rooms in the App Settings
- You will now be able to select this meeting room when creating a prospect on Alkimii CRM.